
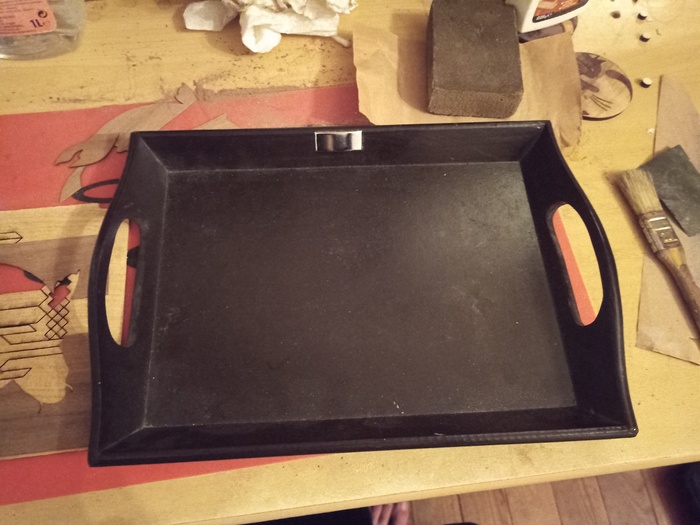
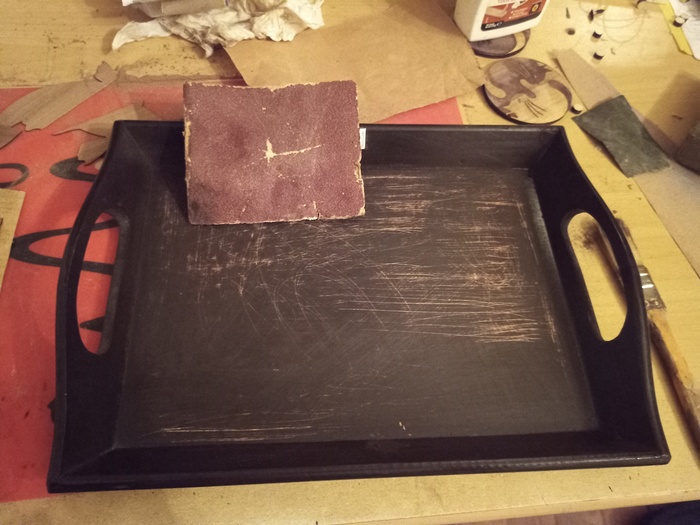
A few years ago, I ask for a simple plate to decorate. I never did it.
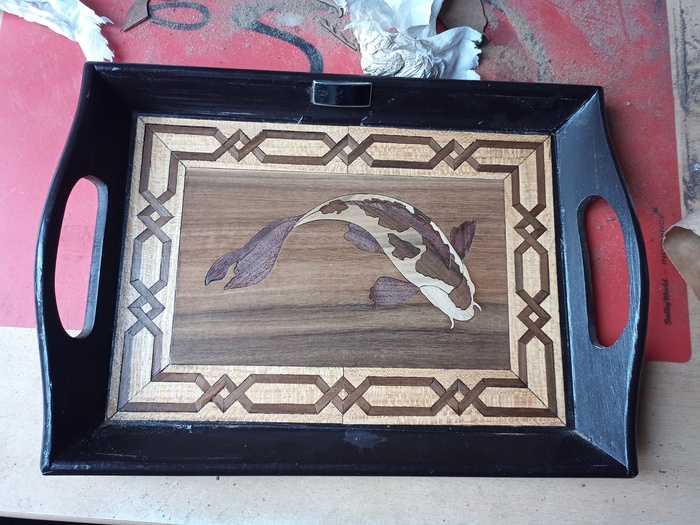
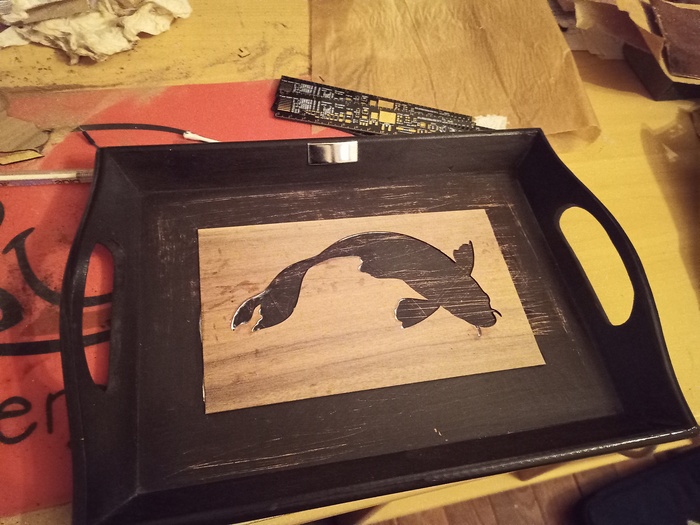
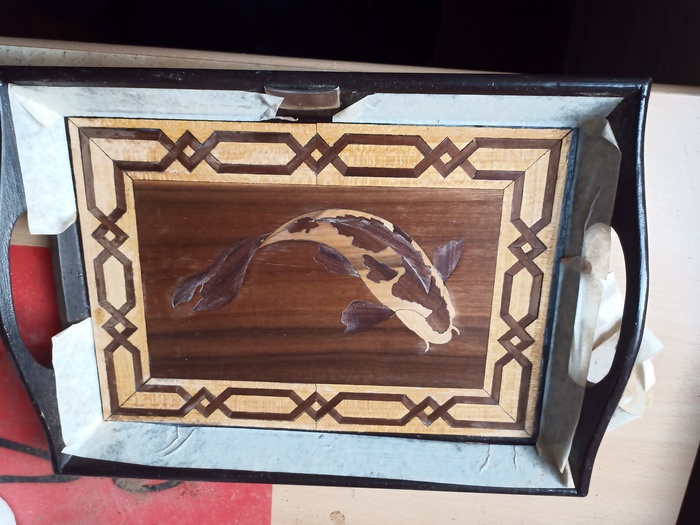
This christmass, I decided to do some marquetry, and to put a Koi fish in.
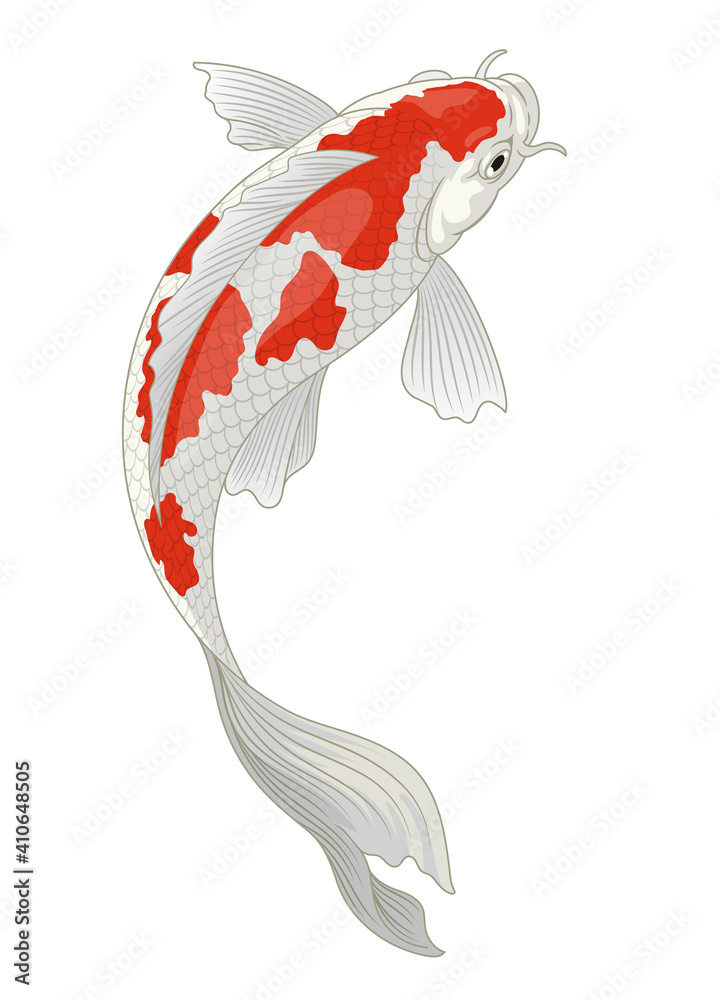
I spent some time searching for the “best” koi drawing image.
Next, for the colors, I decided to separate:
I wanted also to make a nice border
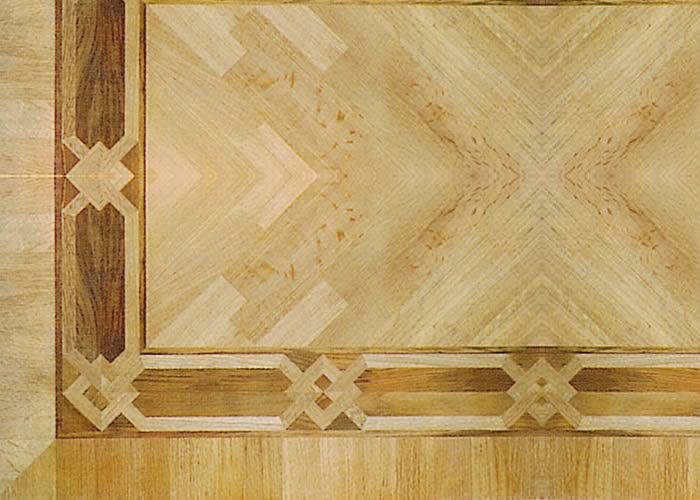
(from tropical woods)
I designed everything on Lightburn.
I cutted all small pieces and start the assembly.
While for cutting 5mm plywood, my sculpfun S10 needs to be at 4mm/sec, here for very thin marquetry wood, 25mm/sec is enough and depends on the wood color.
I shutted down the air pump, as the small pieces would fly away…
First, I needed to scratch the plate for the glue to stick to it. It does not need to be very clean. Wood would cover it anyway.
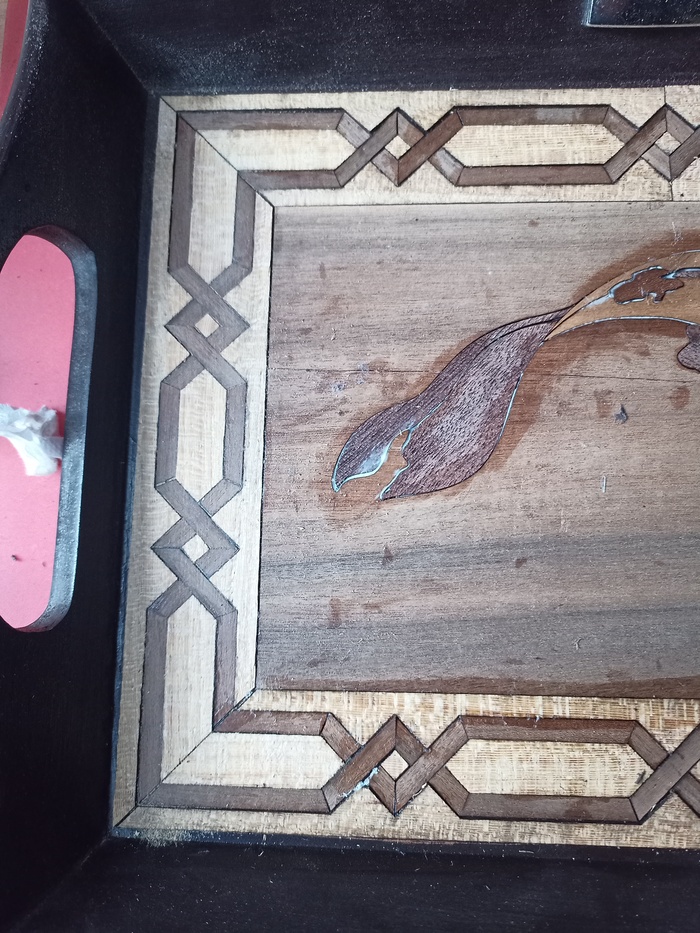
I used the largest marquetry sheet to separate the border from the insider.
I started with the border. I putted glue progressively to avoid drying (using a Q-tip, this is a very cheap and precise brush).
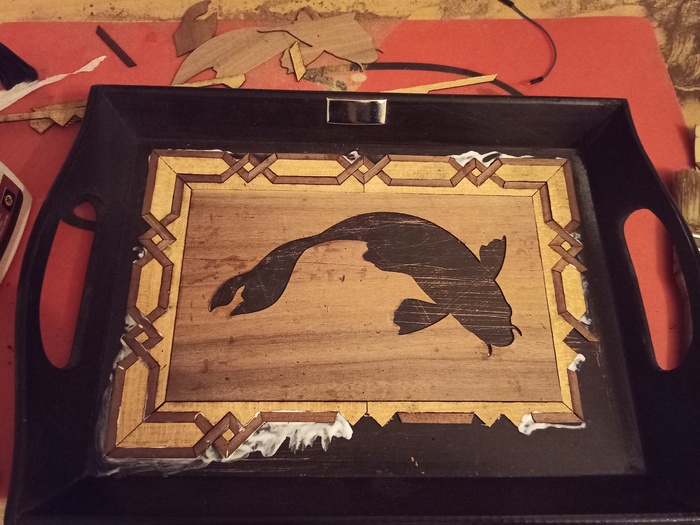
This was a 1h30 puzzle game.

After one drying night, I started the fish.
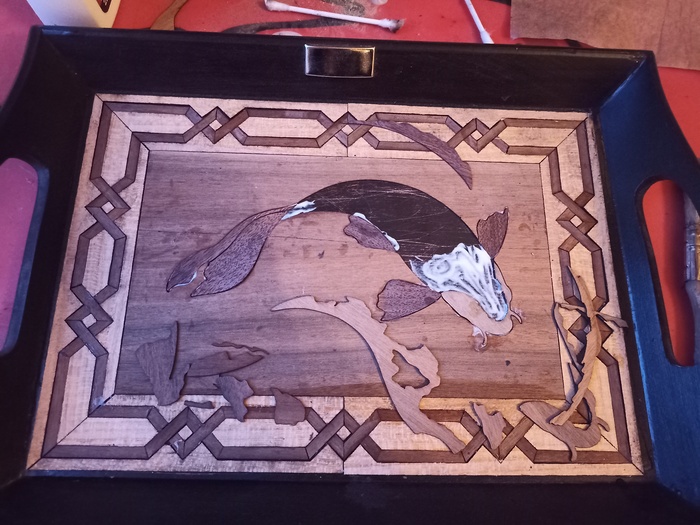
There was two errors on this project:
After sanding with a thin grain, I applied some wood varnish on it
>> You can subscribe to my mailing list here for a monthly update. <<